Creating Desktop Icons in Linux
Outline
As mentioned in this we usually use simple goScripts to launch our DCC apps, which makes running things from a simple icon click slightly more complex. This post will explain some of these issues and how we can create a simple launcher for Houdini.
TLDR;
cp /public/devel/23-24/bin/HouShell.desktop ~/Desktop
Then Double click and accept!
Introduction
To launch an application from a Desktop icon we need to create a .desktop file in the ~/Desktop folder that points to the application we wish to launch. This file is based on the
Desktop Entry Specification which is a standard for linux desktops.
Usually this will point to a particular application and run it. The issue we have is that we need to execute a series of shell scripts to make our DCC apps to run which makes things harder. To overcome this we generate a 2nd shell script that is executed from the .desktop launcher.
To get started we can do the following in the terminal
cp /public/devel/23-24/bin/HouShell.desktop ~/Desktop
This will copy a desktop entry to open a Houdini Shell into our desktop. At first this will appear as a blank icon, if you click on it you will be asked to trust and launch. This will then open a Houdini Shell where you can now run applications such as hython and hrender (as well as now launching houdini via just typing houdini).
Terminal Profile
It is possible to create new terminal profiles in the Gnome Terminal which will execute a script before the terminal session is opened.
We can use this to setup an environment for us that is different than the default one. In the following example we will execute the houdini setup script used in the above example but this time within a new shell profile.
First we choose Edit->Preferences from the terminal menu. Which will bring up the following dialog.
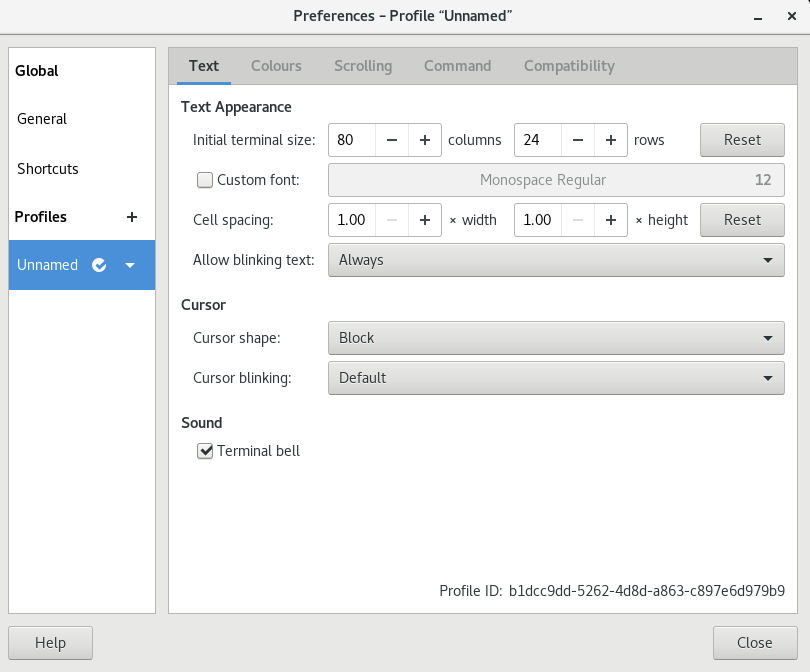
Click the + button next to the profiles tab.
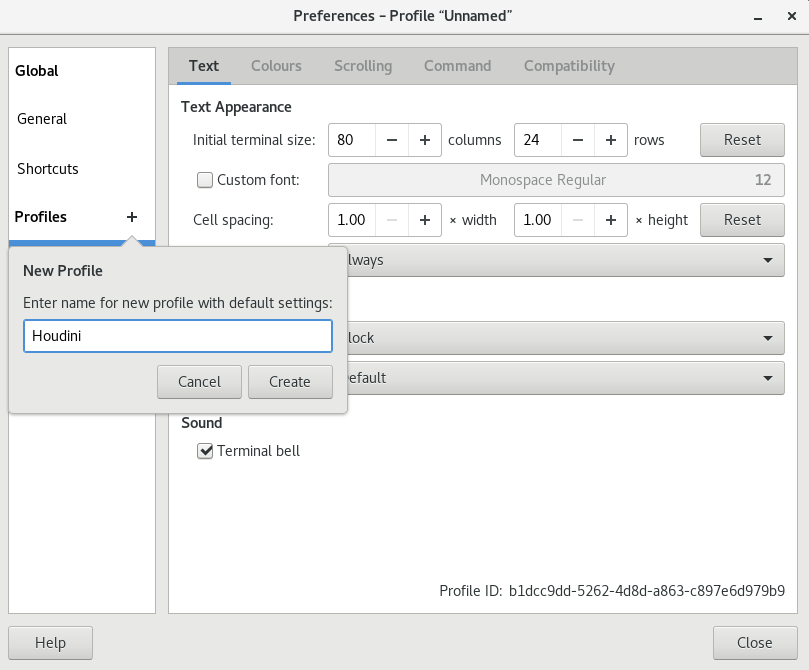
We can then add a new named profile. I have called it Houdini.
Next we need to add the launch script to the terminal, first we click the “run custom command instead of my shell” and add /public/devel/23-24/bin/houshell.sh We also need to change the tab below to “Hold the terminal open” so it doesn’t close when finished.
We can now Do File->New Tab to choose Houdini as an option.
Technical Detail
In all of these examples we execute a shell script that runs the application we need. The script for the houdini example is as follows
#!/usr/bin/bash
cd /opt/hfs19.5.605/
source houdini_setup_bash
cd $HOME
$SHELL
This script changes into the houdini directory and sources the houdini_setup_bash script. This script is provided by SideFX to setup the houdini environment.
Next we change back to the users $HOME directory and invoke the standard shell ready to be used.
HouShell.desktop
The HouShell.desktop file contains the following entries.
[Desktop Entry]
Version=1.0
Type=Application
Terminal=
Exec=me="Houdini Terminal"
Exec=/usr/bin/gnome-terminal  -- bash -c "/public/devel/23-24/bin/houshell.sh; ex
ec bash"
Name=HouTerminal
Comment=This will start the Houdini Terminal Session
Icon=/opt/hfs19.5.605/houdini_logo.png
GenericName[en_GB.UTF8]=Run the Houdini 19.5 Setup
This is based on the Desktop Entry Specification but the most important line is the Exec line.
This invokes the bash terminal in command mode so the line following the -c command is executed. In this case we do two things, first run the houshell.sh command followed by running bash via the exec command. This will leave the terminal open ready to use.
The Icon is a standard png file taken from the Houdini directory, you can choose other png files if you wish.
What about Maya?
It is easy to create launchers for any of the applications that run using goScripts, the following example works for Maya but with a little change we can modify this for any applications.
cp /public/devel/23-24/bin/Maya.desktop ~/Desktop
This desktop file executes the goMaya script as shown below.
[Desktop Entry]
Version=1.0
Type=Application
Terminal=
Exec=me=Maya
Exec=/usr/bin/gnome-terminal  --working-directory=$HOME -- bash -c "source /public/bin/2023/goMaya" &
Name=Maya
Comment=This will create an environment to use Maya
Icon=/opt/autodesk/maya/icons/mayaico.png
GenericName[en_GB.UTF8]=Run Maya
In the Exec part we still execute the gnome-terminal but this time we just source the goMaya script. The only other thing required is to find a suitable icon. In this case Maya has a icons directory (as do most applications) and I choose the mayaico.png file for the icon.
If you wish to setup other desktop scripts you can copy this file and give it a different name. Once this is done you can edit it in a text editor to change the various elements.